All posts by admin

About admin

Store owner of http://nst.my Love to cook,bake and gardening.

Pasta Maker 意大利面机

The pasta maker above is coming in end of January, limited unit are bringing in therefore, if you want to buy, you can email and let me know.  Recipes will be provided.  With the simple recipe you can make all varieties shape of pasta by yourself.  The pasta maker is easy to use, even your 6 years old kids can also work on this pasta maker.  It is a bit expensive because the Japanese Yen keep increasing and the shipping fee also high.
But it is worth buying, it is more healthy to make the pasta by yourself and it is also fun to make the pasta with your kids.  One Unit of this pasta maker is RM550

这个意大利面机可说是老少皆宜的物品,它可以做出各种市面上购买到的意大利面的形状。虽然一台价格需要RM550,但是吃着自己做的意大利面也吃得比较安心,而且也比较便宜,又可以与你6岁以上的孩子一起做,可以说是好玩又好用的物品。我觉得是物有所值哦!

这台意大利面机1月尾就会抵达,有兴趣购买的朋友可以跟我联络。由于我只限量带进来所以卖完就没有了哦!

Cartoon ABC Soup 卡通营养菜汤

I believe most of you already know how to cook this ABC soup, it is very simple the ingredients you need is
1 carrot
1 potato
1 tomato
some ikan bilis
put 2 bowls of water and cook until all the ingredient soft, no other seasoning needed and the soup is ready to serve.
Instead of normal ABC soup I use tomica vegie mould and hello kitty vegie mould to have different kind of shape for carrot and potato.  Children will love it so much and will eat more.  Beside cutting vegetable, the mould can also use for bread, cheese,ham, fruits,cookies etc.  With your creativity, I believe you will come out with more ideas with the mould.

Remember don’t throw away those residue of potato or carrot, you can either put into your soup and cook together and chop it into small pieces and use it for fry rice.

Below is the step by step picture guide of using the mould


3D Hello kitty

Preparing bento sometime no need to be very complicated, with some creative ideas and tools you can always comes out with new and nice bento box for your kids.  For this bento box, it is a very simple one,
I have use the Hello Kitty Big Size Cookie Cutters or Sandwich Cutter to cut and stamp the bread. Actually there will no line on the kitty face, but I have press too hard, therefore the line is show. Then I have used animal world food cup to put the coco crunch. Besides, there are some cherry tomatoes, jelly and lettuce.  I have used the monkey sauce container to store the salad dressing and used the ocean world picks on the tomatoes for decoration and easy to eat. The monkey sauce container 1 set got 2, if you look clearly you will found 1 is male monkey and the other is female and it comes with the spoon with the shaped of banana.  It is very cute. 

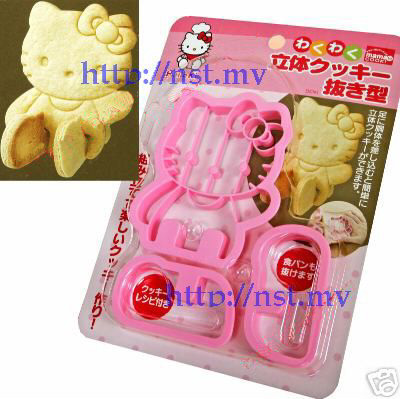
The Hello Kitty Big Size Cookie Cutters or Sandwich Cutter can also be use to make a 3D Hello Kitty cookies, below is the translated recipe behind of the package. It is also the same for the Pooh Big size cookies cutters


Ingredients:


200g cake flour

65g unsalted butter

50g fine sugar

1 egg

1/2 teaspoon baking powder

some vanilla essence


Method:

1.       At room temperature soften the butter, divider the sugar into 2-3 portion and add in 2-3times,beat until hard.

2.       Add in egg and mix well.

3.       Add in vanilla essence

4.       Sieve the cake flour and baking powder and add in 2-3 times.

5.       Shaped the dough round, put into plastic bag and put in refrigerator for 30 mins.

6.       Take out and flatten with rolling pan until the thickness of 4mm, use the mould to cut out and stamp the hello kitty shaped.

7.       Pre-heat oven to 180 degree and bake for approx.13-15mins

8.       Take out and let it cool before serve or keep in bottle.


The 3D hello kitty can wrap in pretty plastic bag and give it as present.  It can also look great to decorate on a cake.  To make the cookies more attractive, you can put the melted chocolate into sauce pen and draw out the expression of the Hello Kitty.


Hello Kitty香草饼干


材料:
低筋面粉200g+无盐奶油65g+细砂糖50g+全蛋1个+baking power1/2茶匙
+
香草精少许
 
作法:
1.
将预先于室温软化的奶油打散,分2-3次加入细砂糖,继续打发打发成羽毛状
2.
分次加入打散的全蛋液混合均匀
3.
加入香草精
4.
低筋面粉&baking power过筛后分2-3次加入混合均匀
5.
整成圆形用塑胶袋或保鲜膜包好,放入冰箱30分
6.
取出杆平成4mm的薄片,用饼干模压出形状放到烤盘上
7.
饼干放入已预热180度的烤箱烤13-15分钟
8.
取出放凉后,轻轻组装即可


除了可以做成手工點心禮物,也可以放在蛋糕上做裝飾很討喜


如果想要更可愛,可以用醬料筆,放入溶化的巧克力來讓表情更生動哦


Japanese Curry 日式咖哩

Japanese curry is not only delicious, it is also very easy to prepare, therefore it is very suitable for a lazy people like me.  To make the dish more adorable, I have use kitty mould to make the rice into kitty shaped and use green peas and corn as eyes and nose.  To have the rice stick together, make sure your rice is still hot, otherwise you won’t get a nice kitty shaped.  Haha, looks like my hello kitty does not looks like hello kitty at all, well I am too hungry so just quickly make and shot.  I believe you can make it better than me.  You can also try out other mould to have other shape of rice too.


Here is the recipe, you can also get this recipe from when you buy the Japanese curry cube, it is just behind the box. The Japanese curry is not like Indian or malay curry, it is not spicy at all even you have choose the hot one.  If you are afraid it is spicy, you can choose mild hot, I am afraid my 2 and half year daughter will feel spicy so I bought mild hot, surprisingly, she not feel spicy at all and she love it very much. The recipe I have adjusted it to 4 servings.


Ingredients

half box house java curry sauce mix

meat (beef/pork/chicken)250g,2 medium onions(400g), 2 medium potatoes(300g),1 medium carrot (200g)

Method

1.       cut meat or chicken onions, potatoes and carrot into bite size. Saute in saucepan until lightly browned. Add 3 cups of water(1300ml) and bring to boil.  Cook over low to medium heat about 20 mins or until tender.

2.       Remove from heat.  Break curry sauce mix into pieces and add to saucepan.

3.       cook over low heat about 20 mins, or until curry thickens.  Serve over cooked rice or pastas.

中文食谱迟些补上

DIY Ice-cream Maker with recipe

Finally the DIY ice-cream maker is here, my daughter is very excited when seeing the ice-cream maker because outside the box got the picture of ice-cream, so I thought she thought there is ice-cream inside therefore want me to open the box.  I look thru the step by step picture and the ingredients, it is so simple and with the ingredients in your fridge you can make ice-cream any time you want.  Here is the recipe


Ingredient A

Approx. 18 square ice-cube

300ml ice water

120g salt (use the cheapest one)


Ingredient B

1 egg yolk

20g fine sugar

100ml full cream milk (can change to strawberry/chocolate/coffee etc flavour) (I am using the chocolate milk)

50ml whipping cream


Step 1 put all the ingredient A into the place shown in the picture.

Step 2 mix well ingredient B and pour into the center of the ice-cream maker as shown as picture

Step 3 put in the stir bar and cover it with lid. Turn the moving handle on top of the ice-cream maker in the clockwise position for about 6-10mins.

Step4 when the mixer become cream, change the stir bar to another equipment.

Step 5 at the center of the ice-cream mixer, there is a picture of heart, you can turn it to right or to left to have different shaped of ice-cream comes out.

Step 6 turn the moving handle clockwise again, be sure you have put a cup or ice-cream cup at the bottom of ice-cream maker. You will see your ice-cream start to comes up nicely.  You need to turn it fast to have nice shaped.


Important tips

1.       Please do not use low fat milk, you won’t success using low fat milk

2.       The whole process, you need to do it fast because if the temperature has increase you won’t get the ice-cream. So make sure you have prepare all the things first.

3.       You can put the center container of the ice-cream maker in the fridge for 1 night to make is more cold.(This step is optional)

4.       For whipping cream, I am using dairy whipping cream, if use non-dairy whipping cream it will become cream more faster but you might need to reduce the sugar.


I really enjoy using this ice-cream maker because it is really fun to use, you can even involve your kids in the process.  Besides, it does not contain any preservatives, it is more healthy and you can make your own ice-cream any time any flavour you like.  You can also put in fruits, cotton candy, chocolate, syrup etc on top of the ice-cream.


这个雪糕机到货不是很久,但是我已经爱上了她,因为他容易使用,对我们喜欢雪糕的朋友来说可以说是必备的物品,它不只是做法容易,材料简单。最重要的是只要平时冰箱里都有这些材料,随时都可以做。而且没有防腐剂哦!

1.一般制冰盒冰块*18个左右+冰水300ml.+盐120g(最便宜的)放入凹槽

2.在搅拌杯子里放入搅拌好的霜淇淋材料:

   蛋黄*1+细砂糖*20g+冰全脂牛奶100ml.+鲜奶油50ml (我用的是巧克力牛奶)

(牛奶可以换成巧克力/草莓/咖啡/抹茶牛奶等口味哦,糖就斟酌)

3.把搅拌桨放入,装好摇杆,盖上盖子,给他开心转转转(大概6~10分钟)

4.会感觉液体渐渐变成cream状到喜欢程度时,换掉上零件,就ok啦!

可以另外准备超市都有卖的,巧克力或焦糖浆那些淋上去,或是棉花糖/水果/饼干脆片就ok啦!


叮嘱:

1.  确记,一定要用全脂牛奶,用低脂牛奶的话会失败,因为我们都不像日本的牛奶那样香浓

2.  操作过程要迅速,如果温度一升高,就会容易失败,我都事先把材料用好,一切都非常迅速,不可以慢吞吞

3.  你可以把中间装料的那个盆子,先在冷冻放一天

4.  鲜奶油可以用动物性或是植物性的。当然植物性比较容易打发,只是就要减糖


Hello Kitty Donut Maker (kitty脸型甜甜圈)

Japan is just coming out with this cute Hello Kitty Face shaped Donut Maker Set.  This set come with  4 kitty head shaped donut mould + multipurpose shaker cup + recipe. It is very easy to use, I will take the step by step pictures when I have try out.  This items will arrive around Jan 2009. 

Size:
Multipurpose shaker cup:approx.13×8×Height 19.5cm
kitty shaped donut mould x4:approx.11×7.5×height 6cm
■Material:ABS、PP、パッキン:シリコンゴム

The price is a bit expensive, it is because it is limited items.  If you miss it this time, you will not have the chance to get it again.  Estimate price is RM199, if you are interested in this donut maker, you can email me and reserve a unit.

Beside making donut, it can also use for pudding/steam egg/jelly/cake.  This mould cannot put in oven, it is use in microwave. The multipurpose shaker cup is very convenience to use, you can even use it to make bubble tea.

2008年就快结束了,很快的2009年就快到来了,2009年日本将会有很多新的模具,相信大家都非常的期待,可惜的是日元一直上升,加上邮费也涨价所以物品也稍微涨了。这次日本出了kitty脸型甜甜圈,每次到big apple看见那些可爱形状的甜甜圈都忍不住想买来吃。这次这个kitty脸型甜甜圈真的是与众不同,而且是限量出售的,这次错过了就可能很难买到了。最重要的是它非常容易使用,即使是对烘焙一窍不通的人都可以轻易的作成功。大约1月会到货,我将会试做然后附上步骤图,方便大家。由于是限量的所有价钱比较贵,大约RM199。有兴趣的朋友可以email我,跟我预购。

一套有4个头型模子+食谱+搅拌杯,这个杯子还蛮方便的!也可以拿来摇泡沫红茶哦!^^
■尺寸:
多功能摇摇搅拌杯:约13×8×高19.5cm
kitty脸型模*4:约11×7.5×高6cm
■主材:ABS、PP、パッキン:シリコンゴム

模子可以以后做布丁/蒸蛋/蛋糕/发糕/果冻 ,杯子以后做松饼就方便了,就可以一杯到底!

 
ps:可以用来调水饺沾酱/沙拉酱料拌匀哦

看来这个杯子用途很多!因为它有附一个可以帮助搅拌的,所以很方便哦!

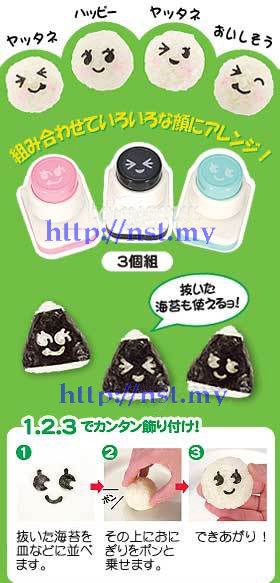
Seaweed Puncher

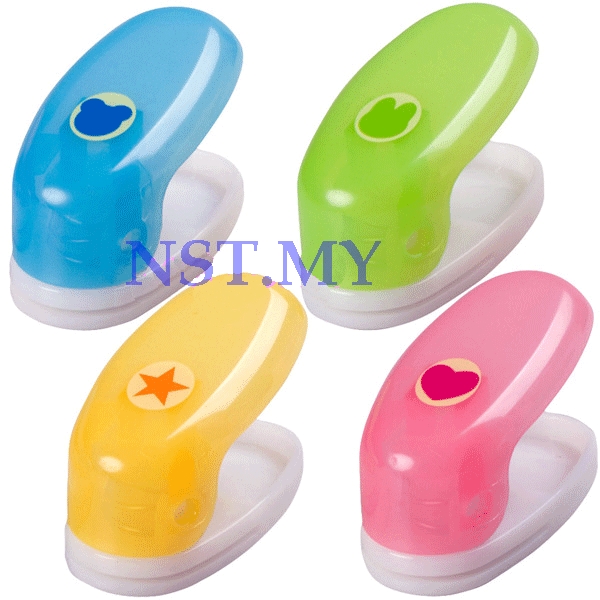
Recently I found some people having problem with the seaweed puncher.  Actually there are 2 types of seaweed puncher, one type is the whole puncher is plastic like, another type the puncher part is metal.
The plastic like puncher will be a bit harder to punch the seaweed as the weather in Malaysia is hot and humid and the seaweed will get soft quickly.  For the metal seaweed puncher will be a lot more easier to use but the price is higher. 

There is a tips for those who are buying the plastic like puncher.  Before you punch the seaweed, you can always grilled the seaweed on pan or put in oven and bake till crispy, it will become more easy to punch and it is crispy.

When cleaning the puncher you can always use a cotton bud and apply a little bit of oil to clean out the seaweed residue in the puncher.  For the metal puncher, after you wash using water, you might want to dry it before storage.

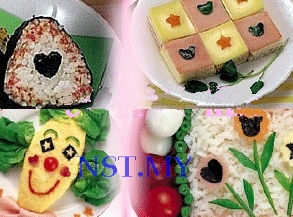
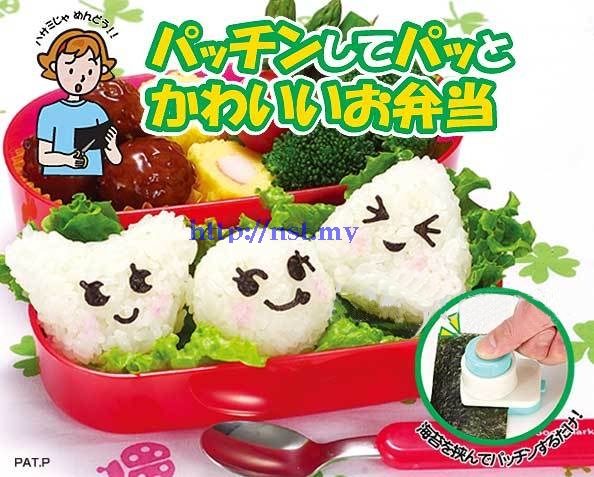
Seaweed puncher is very easy to use and fun to decorate your bento box, especially the sparkling eye seaweed puncher and cute expression seaweed puncher will cheers up your love one

Below showing is one of the plastic like seaweed puncher

Be

Here is the metal seaweed puncher

Pooh Muffin 维尼玛芬

125 grams butter
120 grams fine granulated sugar
2 eggs(size B)
250grams plain flour
1 tablespoon baking powder
125ml milk

Method
1.Cream butter and sugar until light and fluffy. Add eggs gradually (one by one)
2.Fold in sifted flour and baking powder.  Pour in milk and mixed gently.
3.Pipe the mixture onto the Winnie the pooh mould
4.Bake for about 25 minutes at 200 degree celcius.

p/s: to have chocolate colour you can add milo powder or coco powder.

杏仁脆片Crispy Almond

杏仁脆片

材料:

A:牛油100g

  幼糖90g

B:蛋白2粒

瓦尼拉香精1茶匙

C:普通面粉100g

D:杏仁

做法:

1.材料(A)放入大碗搅打至松发,加入(B)料混合后,再到(C)材料拌均。

2.用汤匙舀少许(1)搽在烘焙纸,搽越薄越脆

3.放入预热洪炉,以170度烘15分钟或金黄色,取出待凉后马上收在不透风罐子。


Crispy Almond


Ingredient

A:100g butter

  80g caster sugar

B:2 egg whites

  1 tsp vanilla essence

C: 80g plain flour

Method:

1.Place ingredientA in a big mixing bowl. Beat until fluffy, add in ingredient B and mix well. Fold in ingredient C , combine well.

2. Use a spoon to scoop a bit of (1) and place it on a parchment paper (you can also use a stencil to have different shape) Level off the excess mixture.  Try to make it thin so that it will be more crispy. Place parchment paper on baking tray.  Repeat with remaining mixture.


3. Bake in a preheated oven at 170 degree celcius for 15 mins for until golden. Let it cool and store quickly as it will become soft very quickly.

Hello Kitty Cripsy cookies 酥脆饼

未烘时Before bake

Ingredient A:
180g margarine
1 egg
80g caster sugar

Ingredients B
(sieved together)
250g plain flour
50g corn flour
1tsp baking soda
1/2 tbsp custard powder
1/2 tsp salt

1 egg yolk, mixed with 1/2 tsp salt for glazing

Method
1. Put Ingredient A into a mixing bol, use beater to cream together until fluffy.
2. Slowly add inB and mix into a dough.  Roll the oudh into 1/2 cm this and use the hello kitty cookies mould to cut the shaped of hello kitty and then use the stamper to stamp the face.
3.place the cookies onto a baking tray and glaze with beaten egg.
4. Bake in a preheated oven at 180 degree celcius for 20-25 minutes or until golden brown.

Note:egg yolk added some salt will make the cookies smell more good.
This recipe is good for those who do not like butter flavour.


材料A:
180g 马芝琳
80g幼糖
1粒蛋
材料B:(一起筛过)
250g 面粉
50g 栗粉
1小匙苏打粉
1/2大匙卡士特粉
1/2小匙盐

1粒蛋黄,加入1/2小匙盐拌均,涂抹用

做法:
1.材料A放入搅拌机里,搅拌至松发。
2.慢慢加入材料B拌均成团,然后杆成1/2cm厚片,再用kitty型饼干摸框,印出kitty形状,再用kitty图案模印出kitty的模样。
3.排放在烤盘上,涂上蛋液,放入预热烤箱180度烤20-25分钟或是至金黄色即可。
不喜欢太重牛油味的朋友,这道饼干就适合。